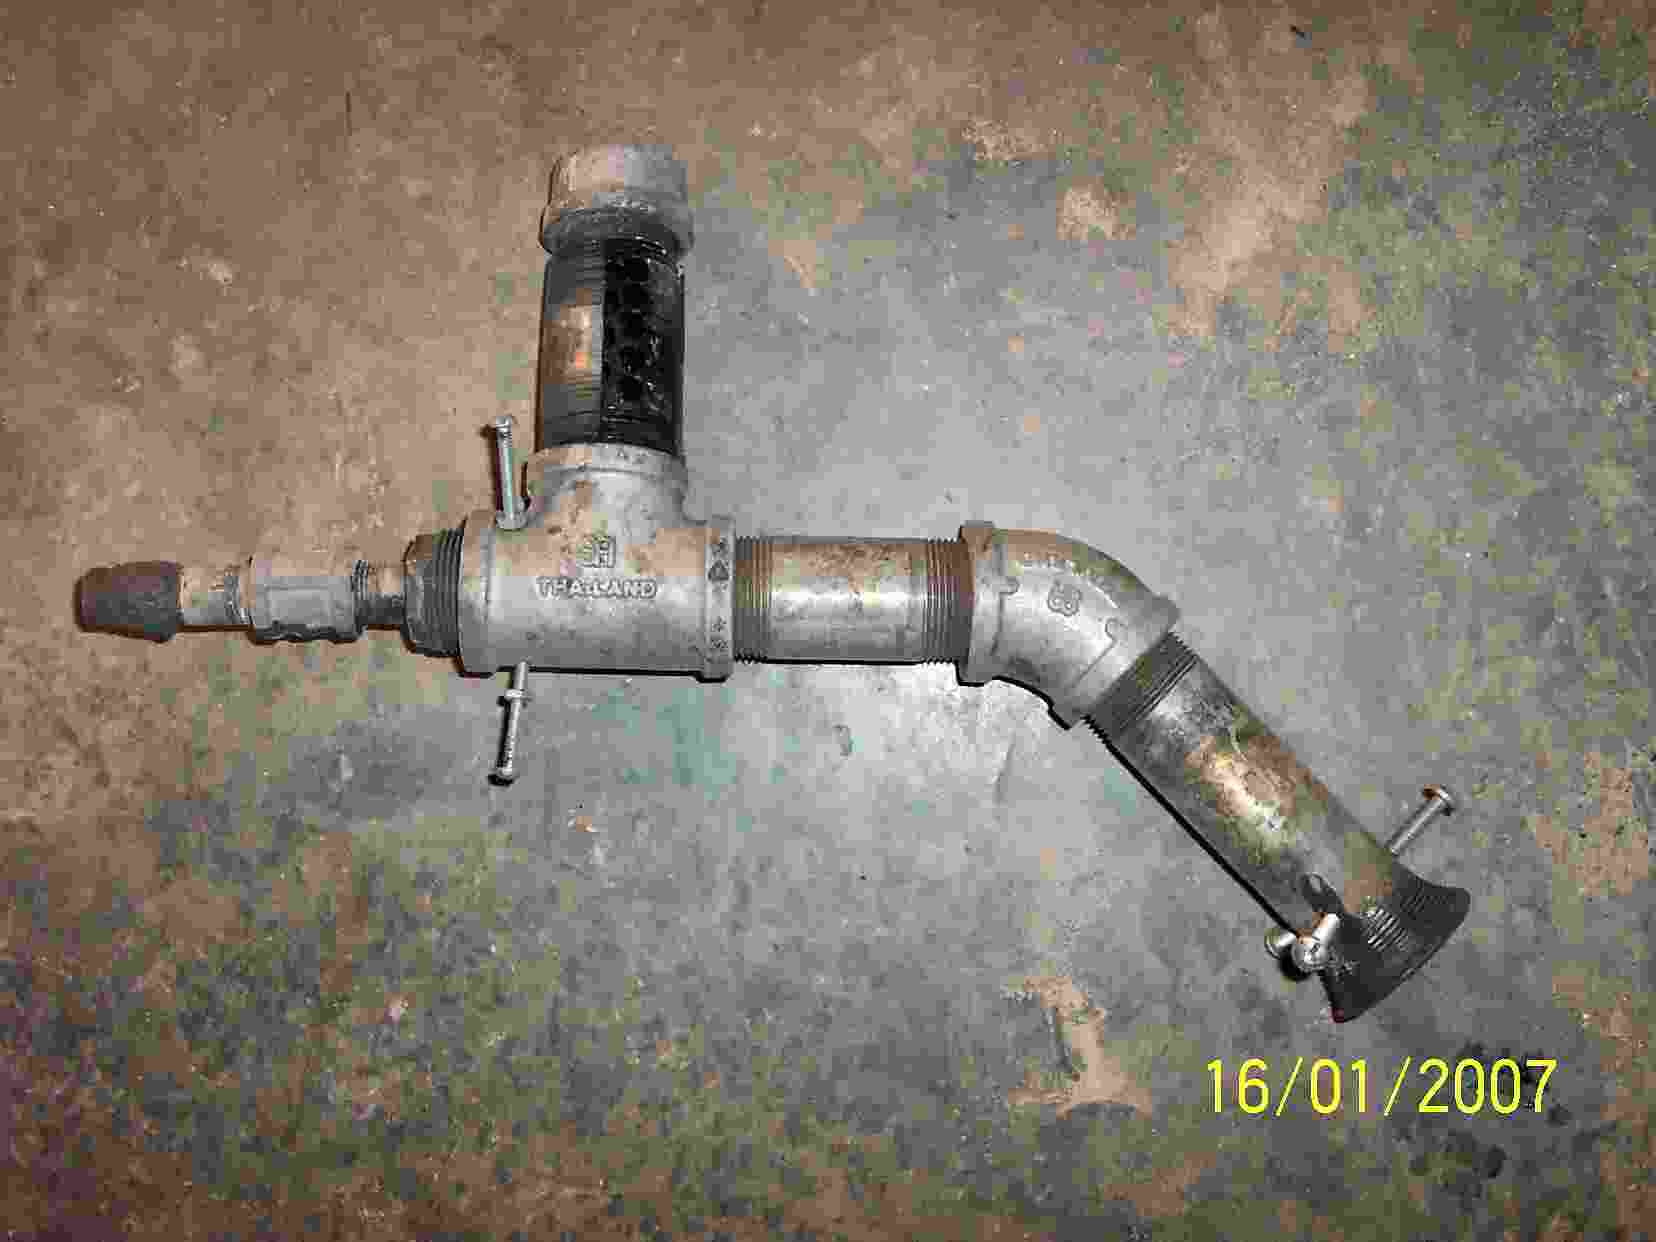
In the images I have attached you can see my assembly, the gas passes out through the 3/4 pipe from the top of the gasifier (mine is a pressurized tlud variant). The 1.5 pipe burner assembly is slipped over that pipe until the end of the 3/4 pipe is just past the air in throttle (the vertical 1.5 pipe in the T). The burner is adjusted by first opening the throttle all the way (the vertical pipe has a strip of holes drilled in one side of it, with a second piece of larger pipe slipped over it, the larger piece of pipe has a section removed. Turning the larger piece of pipe changes the amount of air that can get drawn in thus when the most holes are exposed the throttle is open (the holes SA is much larger than the id of the pipe). With the throttle open and the gasifier running slide the whole assembly back and forth on the 3/4 pipe until some uncombusted gas comes out the throttle, then move it back just to the point that no smoke is coming out the throttle, mark this location, or tighten up the set screws (the set screws combined with the drilled out reducer are what keeps the 3/4 pipe centered in the 1.5 pipe so tighten carefully leaving the same amount of screw protruding). Now light the gas, it will likely get blown out by so I find having a propane torch hand makes this simpler. Now by using the throttle you can adjust the air very simply. I have added the 22.5 degree elbow in my assembly to provide better gas air mixing, this is standard in most venturi based designs. It helps a lot by providing an opportunity for the gas and air to be throughly mixed providing for the most complete combustion. Using this I feel like I got a noticeably shorter much hotter flame likely due to the gas mixing ensuring complete co combustion.
3
